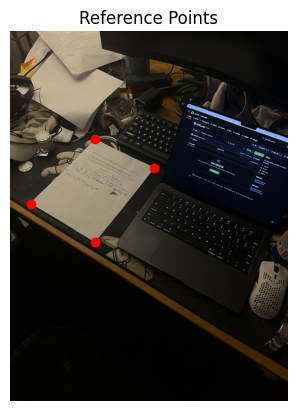
Keypoints on the original image
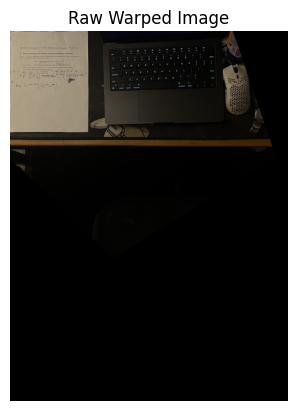
Warped Worksheet
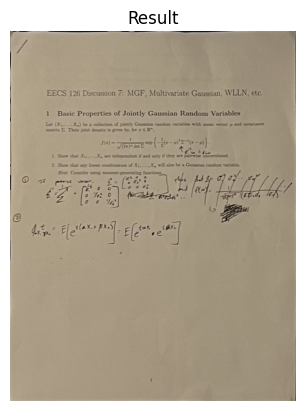
Resulting Worksheet
Tobias Worledge, Fall 2024
In this project, I created an image mosaic by using projective warping, resampling, and composition via human-labeled reference points on the individual image components. This allowed me to rectify a component of a single image, such as a section worksheet. It also allowed me to create a mosaic of multiple images, such as a panorama.
I began by selecting the reference points in the image. I used the provided custom tool to select the corners of the worksheet in the picture. I knew that the worksheet was a piece of standard paper with dimensions 8.8inx11in. This allowed me to define the corresponding points for the warping to enforce those proportions.

Keypoints on the original image

Warped Worksheet

Resulting Worksheet
To create the image mosaics, I captured a series of photographs with significant overlap between each adjacent pair. I ensured that the images were taken from the same position, rotating the camera to capture different parts of the scene. This approach maintains a consistent center of projection, which is crucial for accurate homography estimation.
I just used my iPhone to take the pictures. After some testing, I realized that taking pictures of scenes that had consistent depths helped create good mosaics with fewer artifacts. Excluding people and other moving objects was also important
The next step was to compute the homography matrices that relate each pair
of images. I implemented a function
computeH(im1_pts, im2_pts) that calculates the homography
matrix H using a set of corresponding points between two images.
To obtain accurate correspondences, I used the provided custom tool that allows me to select matching points in overlapping regions of the images. With more than four point correspondences, I set up an overdetermined linear system and solved for H using least-squares minimization. This method reduces the impact of noise and inaccuracies in point selection.
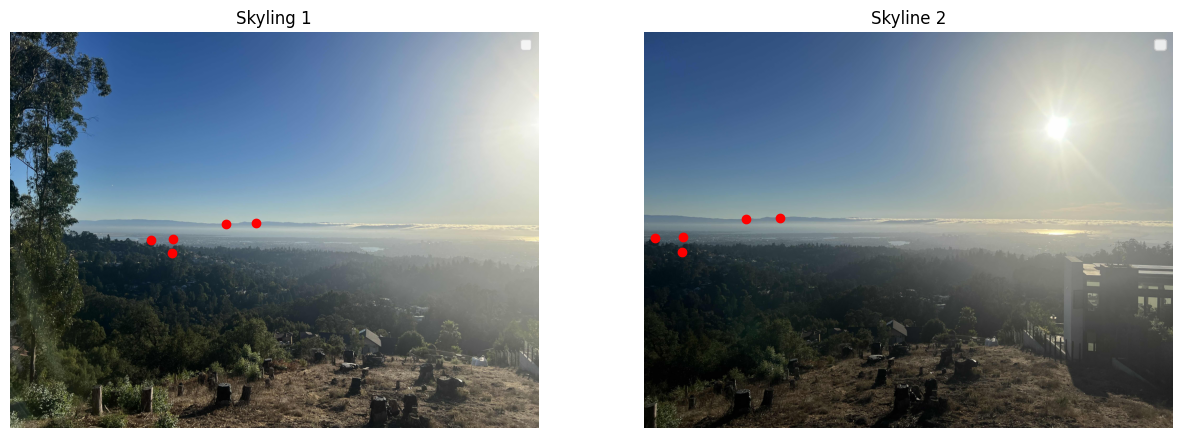
Points for Skyline 1 and 2
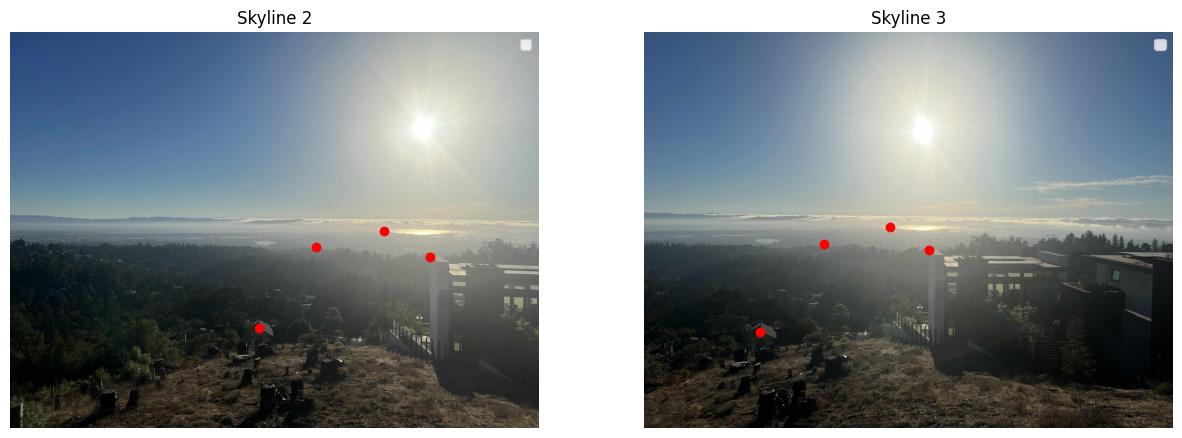
Points for Skyline 2 and 3
With the homography matrices computed, I proceeded to warp the images to
align them with a reference image. I implemented a function
warpImage(im, H) that applies the homography to an image. I
used inverse warping to map coordinates in the destination image back to
the source image, ensuring that every pixel in the output image receives a
value.
To handle aliasing during resampling, I used bilinear interpolation. I also calculated the bounding box of the warped image by transforming the corner points of the original image, which allowed me to allocate the appropriate size for the output image.
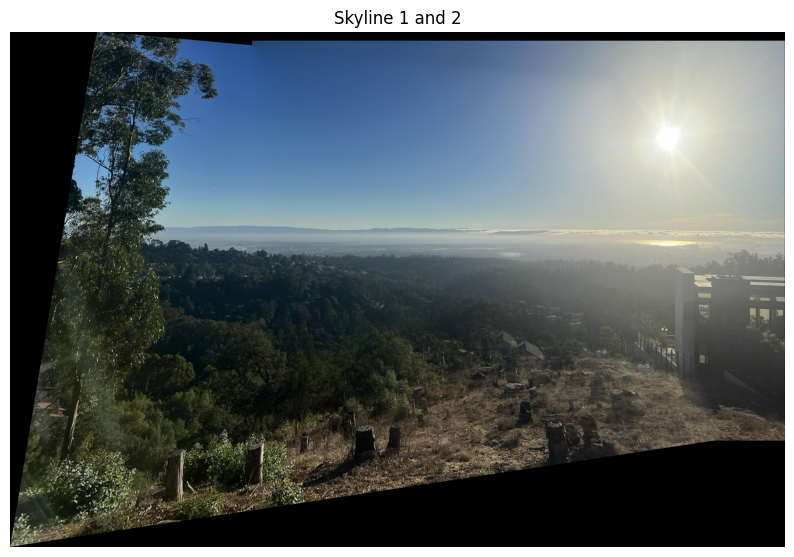
Source Images
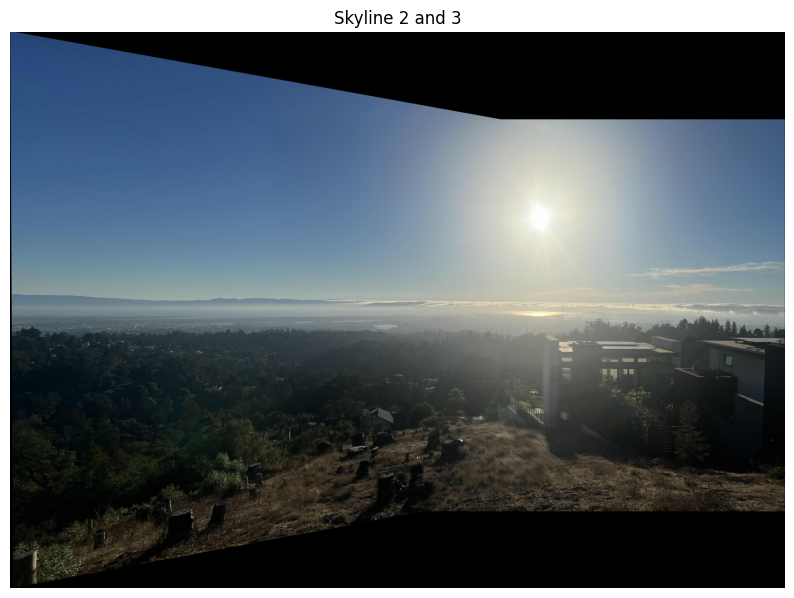
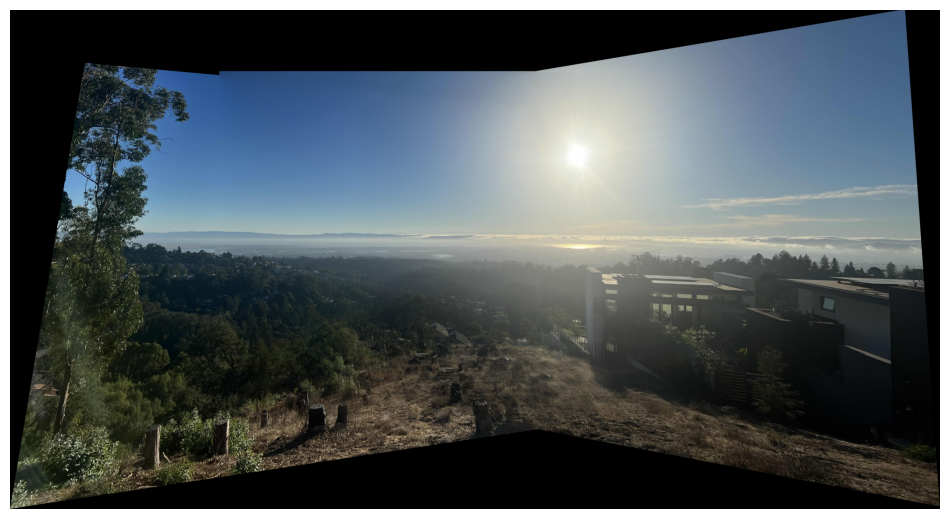
Final Mosaic
After warping the images, I blended them together to create a seamless mosaic. I chose one image as the reference and warped the other images into its coordinate system. To avoid sharp transitions and edge artifacts, I used weighted averaging with an alpha mask for each image.
The alpha mask for each image was designed to have higher values at the center and gradually decrease towards the edges. This approach ensures a smooth blending in the overlapping regions.
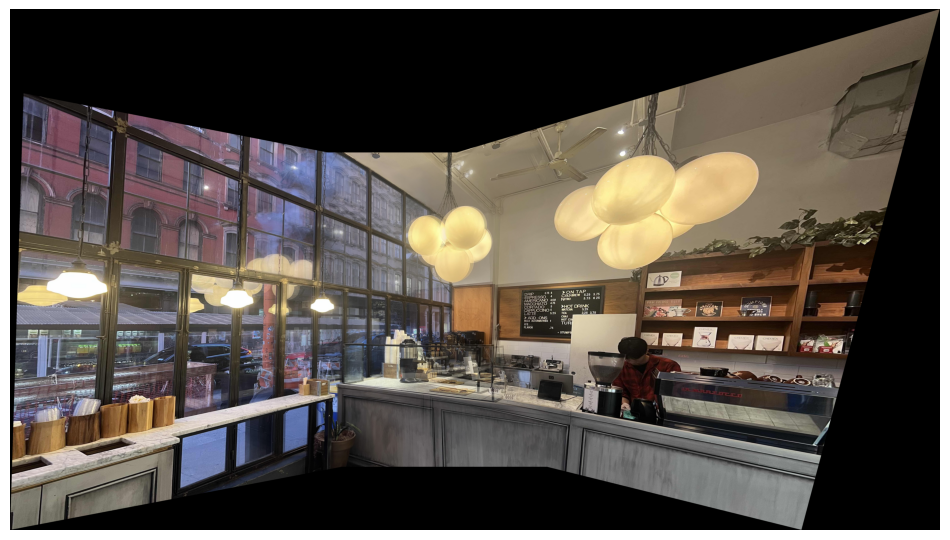
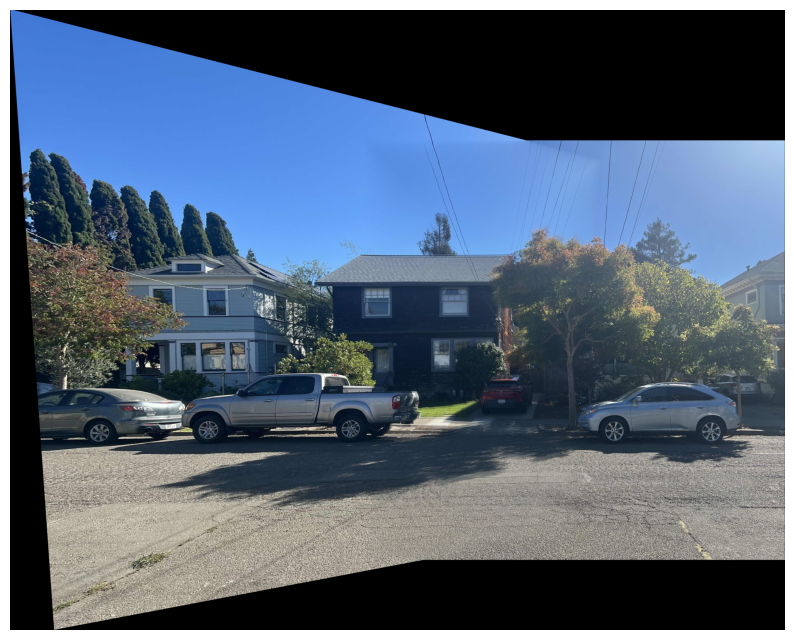
In this part of the project, we focus on automatically detecting features in images and identifying shared features between two images. With these tools, we are able to automatically stitch images together without having to manually label correspondance points. This saves a bunch of effort and produces even more accurate results!
By modifying the provided Harris corners code, we are able to implement adaptive non-maximal suppression as described by the paper. This allows us to select a subset of the Harris corners that are well-distributed across the image and have a high corner response.
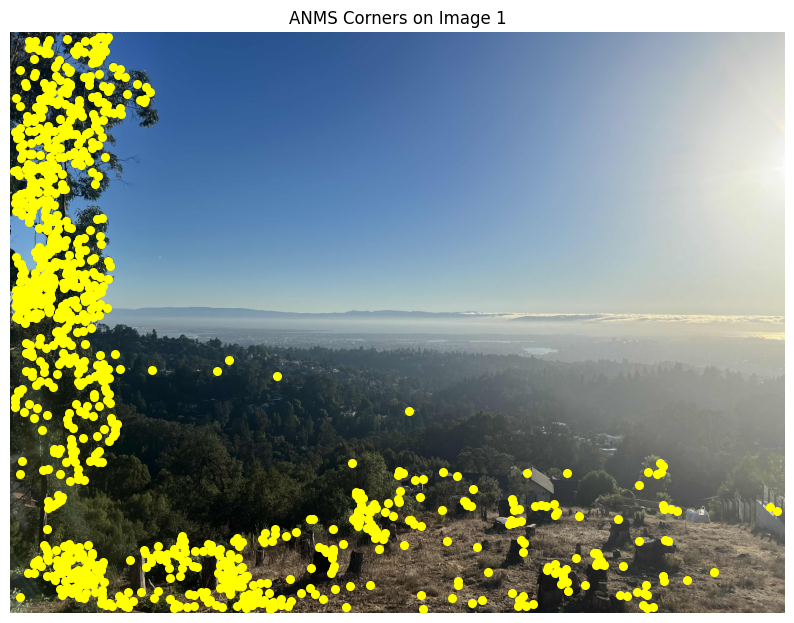
Skyline 1 ANMS
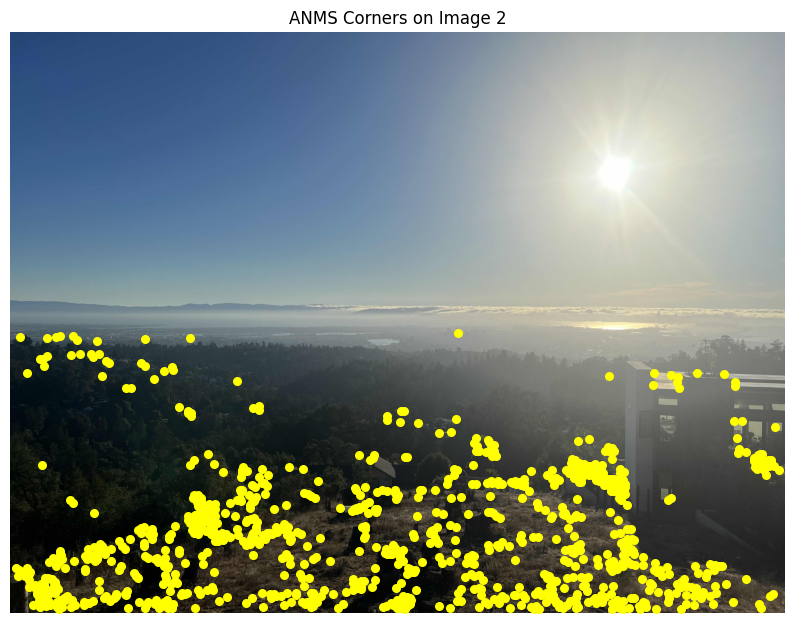
Skyline 2 ANMS
Ok, this is neat. We have a bunch of seemingly "important" points within
each image, but how do we compare and associate these points across
images?
To do this, we extract so-called "features" at each of these points! These
are 40-pixel patches centered at each corner point. We can think of these
as fingerprints that are intended to uniquely describe the local image
content around each corner point. While it would be great to use all of
the pixels in the patch, this would be computationally expensive. Instead,
we transform this window into an 8 by 8 pixel feature descriptor. We will
use this descriptor to compare features across images.

Skyline 1 Features

Skyline 2 Features
Ok neat! Now we have some unique features within each image. Let's figure out how to associate shared features across these two images! For each feature in the first image, we can compare it to all features in the second image and find the best match. This provides us with a set of corresponding features between the two images. We can take the strongest matches and use them to estimate the homography between the images.
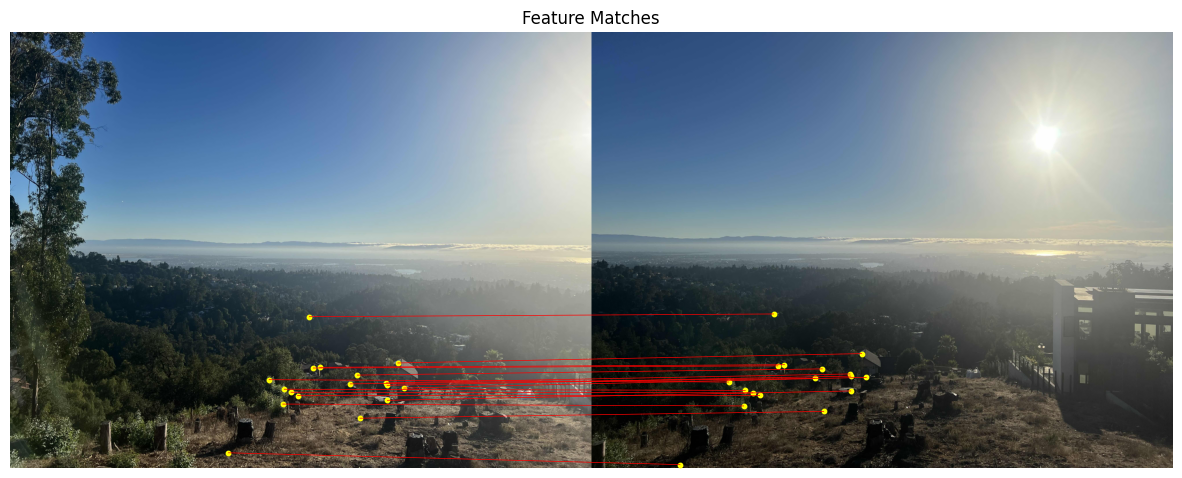
Skyline 1 and 2 Matches
Ok, now we have a bunch of correspondance points, how can we use these to
compute a homography, possibly more accurately than how we had done so
before? RANSAC is a robust method for estimating the homography between
two images given a set of correspondance points. In this implementation,
we repeatedly select 4 random correspondance points that we found above
and compute the homography between them. We then evaluate the homography
on all correspondance points and keep track of the number of inliers. The
homography with the most inliers is then selected as the best homography.
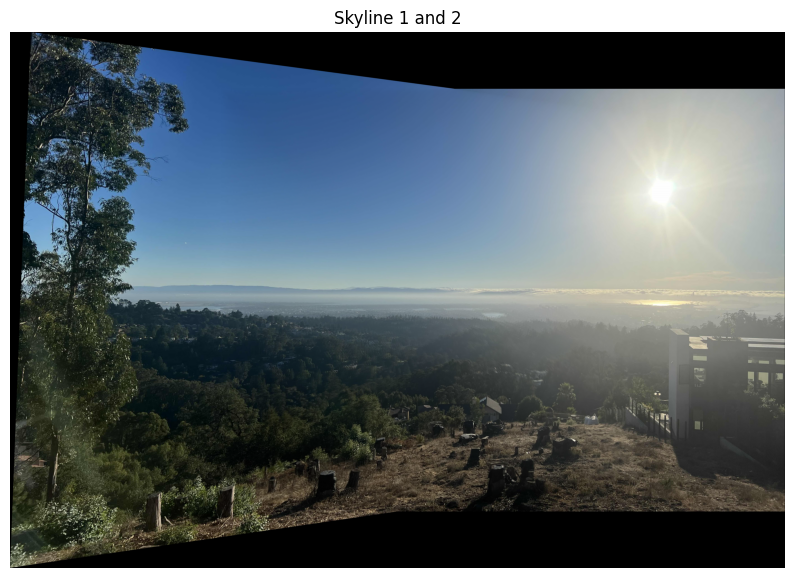
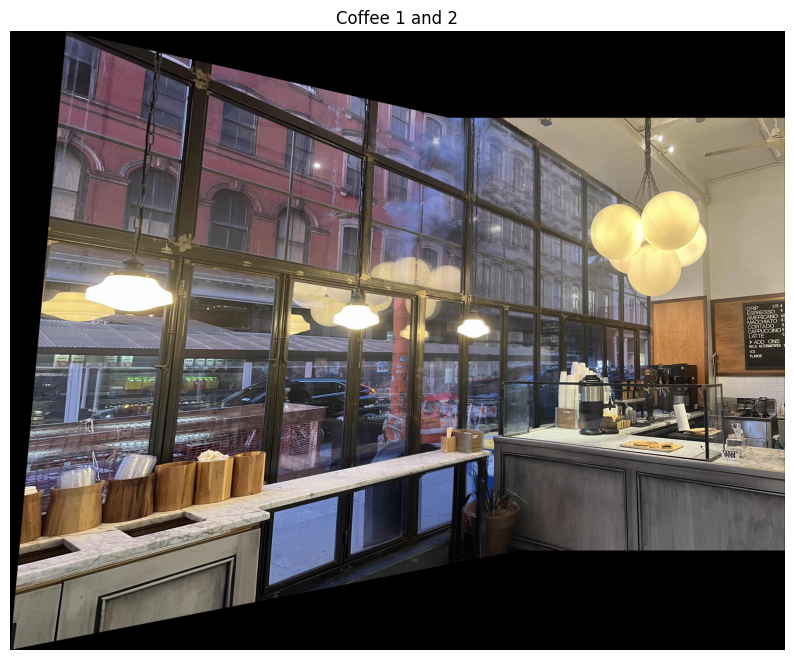
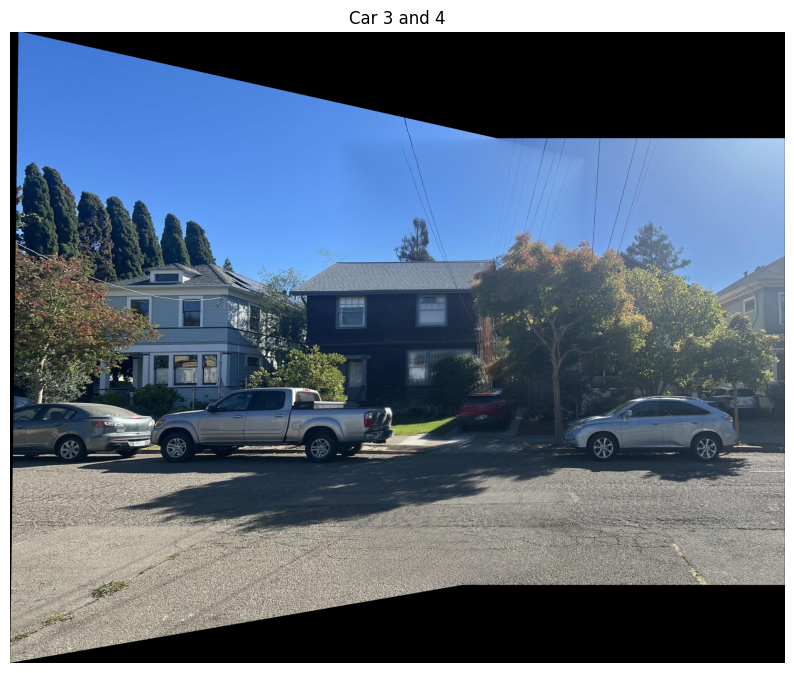
By doing so, we are able to automatically find the best homography
and stitch the images together using the code from the first part of the
project.

Manual Stitching
RANSAC Stitching

Manual Stitching
RANSAC Stitching

Manual Stitching
RANSAC Stitching
This is pretty neat! It took me ~15 minutes to pick out good correspondance points when manually stitching these images together. This implementation is able to automatically stitch the images together in a fraction of the time and with even more accuracy. It's worth noting that the results aren't drastically different, but with RANSAC, some of the warped images are slightly different. This probably means that the points that I picked manually were reasonably effective when stitching the images together.
I really enjoyed learning about how RANSAC works. I think many algorithms and techniques that we are taught aim to find the theoretical optimal solution for the problem at hand. In the real world, there are many problems that can't be solved optimally, and thus approximation algorithms become incredibly powerful. RANSAC is a great example of this. It's not guaranteed that RANSAC will find the best homography, but it provides some statistical certainty that the homography found will be reasonably good.